Updating SSH to use Post-Quantum Crypography, and using Windows Hello as Security-Key

SSH with PQC and security-key
This blogpost was prompted by the excellent 2.5 Admins podcast ep. 227. I don't understand how I did not know about telemetry in Windows, but here we are!
I set out to do 3 things:
- Use Post-Quantum Cryptography hybrid cipher on SSH client and daemon.
- Stop Microsoft from snooping (AKA block SSH telemetry).
- Secure the, not so secure, private keys in Windows' ssh-agent.
So here's 3 blog-posts in a single blog-post. Any of the parts can be used separately.
Post-Quantum Cryptography in SSH
I've been running OpenSSH from ports on FreeBSD for quite a while now. You get new features earlier than you do with the base Operating System. As I cannot help tinkering with ports, I decided that there's no reason my SSH server supports anything but the latest and most secure ciphers and protocols. This prompted me to create a patch for the FreeBSD port that has fewer dependencies. OpenSSH has a flag to build it without the use of OpenSSL. Note that this is marked "experimental" still. I've had zero issues with this, but I only need to support modern clients.
OpenSSH 9.9 added the X-Wing hybrid mlkem768x25519-sha256 Key Exchange method. This uses both X25519 and the newly standardized ML-KEM 768bit ciphers. Unsurprisingly, this also works when building without using OpenSSL.
Windows does not support the new ciphers yet. Windows 11 has OpenSSH 9.5p1, and the latest available is 9.8p1 (preview). Can't tell when a version supporting PQC will be shipped with Windows.
Stop Windows Telemetry in SSH
Rather than fixing the Microsoft OpenSSH port, I resorted to the use of WSL. That's where I spend a lot of my time on Windows anyway. So OpenSSH in Linux it is!
Even then, the OpenSSH version shipped with the latest version of Ubuntu (24.10) does not support the MLKEM768X25519 method. Looks like the upcoming version 25.04 will though!
Securing keys in Windows' ssh-agent
Apparently, the "protected storage" in Windows isn't that secure. Any process with System privileges is able to extract the encrypted blobs from the registry and decrypt the secrets.
Thus the private keys that you load into ssh-agent, as documented in my Using SSH on Windows blogpost are not as secure as you'd want. On regular systems, ssh-agent asks you for the key's password once, then stores the key in memory. On Windows, if you add a key with a passphrase to ssh-agent, it will ask for your password whenever it's used. Conveniently, we can use a FIDO2 hardware key with Microsoft's ssh-agent too, so that's what I'll do.
Looking at Microsoft's OpenSSH repository it seems that the telemetry is used for connections, not when you use ssh-agent. So let's set up SSH with a SecurityKey. Any FIDO2 key will do, Yubikey, Nitrokey, etc. as long as it supports FIDO2.
OpenSSH 9.9 client on Linux
Basically like building any software. Download, extract, configure, install.
My Ubuntu in WSL is already set up for building software, I did install libfido2-dev.
cd
mkdir -p src
cd src
curl https://cdn.openbsd.org/pub/OpenBSD/OpenSSH/portable/openssh-9.9p1.tar.gz -o openssh-9.9p1.tar.gz -L
tar xf openssh-9.9p1.tar.gz
cd openssh-9.9p1
./configure --disable-openssl --with-security-key-builtin
make
sudo make install
This installs the new ssh binary in /usr/local/bin/ssh. If this is not early in your PATH environment, you can add an alias to your profile. Verify that it works.
❯ alias ssh='/usr/local/bin/ssh'
❯ ssh -V
OpenSSH_9.9p1, without OpenSSL
I've investigated installing this using the Ubuntu sources as well. Added deb-src to ubuntu.sources pulled in a load of dependencies.
Then cloned the ubuntu source repository for OpenSSH, the latest is OpenSSH 9.9 and it builds OK on 24.04.1.
Creating an SSH key protected by your FIDO2 key
The ssh-keygen version shipped with Windows 11 supports the ed25519-sk keytype.
This is a regular ed25519 (AKA x25519) key with added SecurityKey protection.
You get presented with a number of dialog screens from Windows to select your FIDO2 key and protect the SSH key with your Security Key.
C:\Users\Username> ssh-keygen -t ed25519-sk -C "Something to identify your key"
Generating public/private ed25519-sk key pair.
You may need to touch your authenticator to authorize key generation.
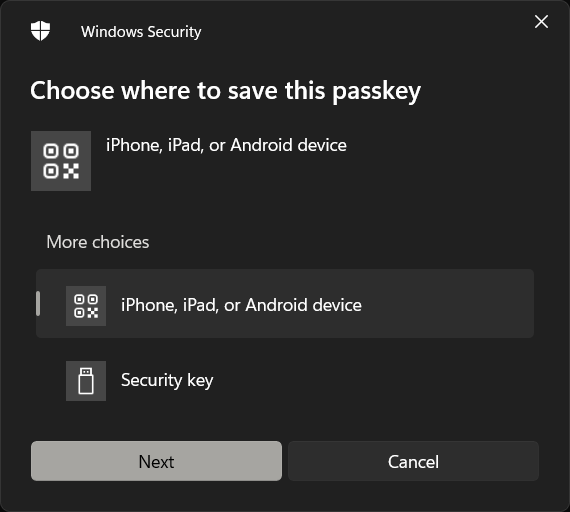 Select "Security Key"
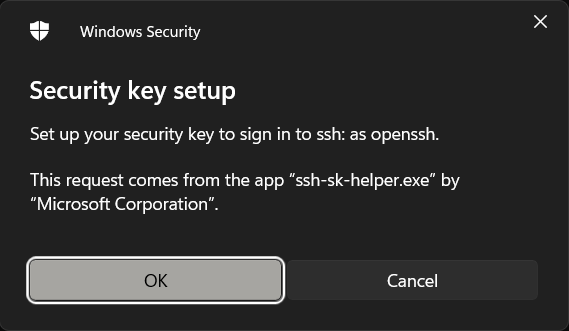 OK
OK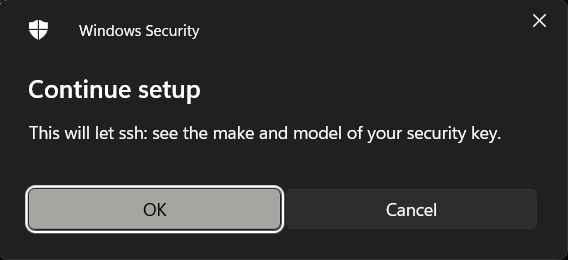 OK
OK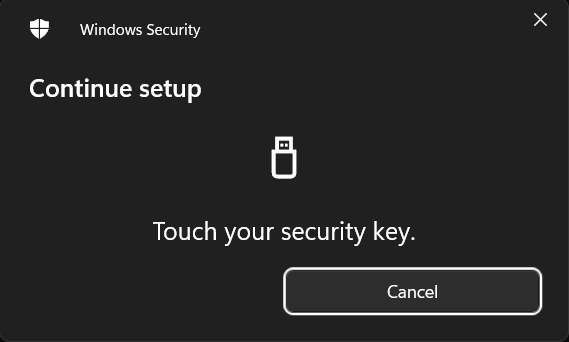 Your security key will give you a visual prompt, usually it lights up.
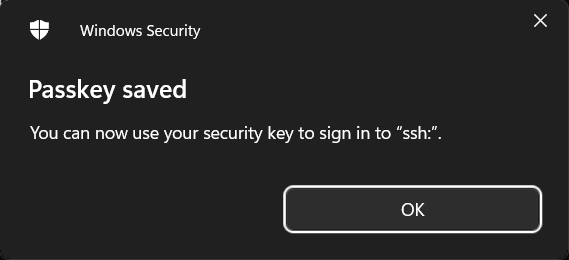
It then asks you for a passphrase to use for the passphrase. We will store the key, and use the Security Key for verification, so we hit enter twice to store it without passphrase.
Enter passphrase (empty for no passphrase):
Enter same passphrase again:
Your identification has been saved in .ssh/id_ed25519-sk
Your public key has been saved in .ssh/id_ed25519-sk.pub
The key fingerprint is:
SHA256:qSqAIzXAEwp6/ufabEK4x2mN0STKGyA/jXW1CrqogGw Yubikey-5C@test.brnrd.eu
The key's randomart image is:
+[ED25519-SK 256]-+
|o..              |
|=o      .        |
|o.o    . .       |
|ooo + o ..       |
|o=.O * .S        |
|B X.+ o.         |
|+E O.=o          |
|+ = B*o          |
|o  +o++          |
+----[SHA256]-----+
Load the private key into Windows' ssh-agent
C:\Users\Username> ssh-add .ssh\id_ed25519-sk
Identity added: .ssh\id_ed25519-sk (Something to identify your key)
Remove the private key, but keep the public (.pub) key.
You need the public key to copy to the server, and you need it if you want to delete this specific key from your Windows ssh-agent.
C:\Users\Username> del .ssh\id_ed25519-sk
Connecting WSL ssh to Windows ssh-agent
You can connect WSL to the ssh-agent running in Windows by running a service in WSL with the npiperelay utility. This exposes a Windows "Named Pipe" as a Unix domain socket using socat.
Install socat in your WSL environment using sudo apt install socat.
Download the Windows npiperelay utility from the project's gitub.
Place the Windows npiperelay.exe binary from the zip file in a directory where you can find it. I've put it in my user's .ssh directory.
Then I've added the following to my profile.
export SSH_AUTH_SOCK=${HOME}/.ssh/agent.sock
ss -a | grep -q $SSH_AUTH_SOCK
if [ $? -ne 0 ]; then
    rm -f ${SSH_AUTH_SOCK}
    ( setsid socat UNIX-LISTEN:${SSH_AUTH_SOCK},fork EXEC:"${HOME}/.ssh/npiperelay.exe -ei -s //./pipe/openssh-ssh-agent",nofork & ) >/dev/null 2>&1
fi
This will check if npiperelay is already running in the WSL context and start it if it's not.
After logging in again (or sourcing your profile, e.g. . .zshrc) you should have an npiperelay process running.
Configuring your ssh client
In your WSL environment, edit your ~/.ssh/config file, or add/modify an additional file to ~/.ssh/config.d/ with specific config for your X-Wing capable servers.
Host brnrd.eu
        KexAlgorithms mlkem768x25519-sha256
Test and validate that your connection is X-Wing protected.
The modified config has an additional effect, if your environment uses the normal SSH client it will fail on a configuration error as it does not know the mlkem768x25519-sha256 Key Exchange Algorithm.
If you now try to establish a connection to your server from WSL, it should use X-Wing / mlkem768x25519-sha256 and show a Windows dialog to select your Security Key and then "Making sure it's you".
# ssh -v brnrd.eu
...
debug1: kex: algorithm: mlkem768x25519-sha256
...
debug1: Offering public key: /home/testuser/.ssh/id_ed25519_sk ED25519-SK SHA256:... authenticator agent
...
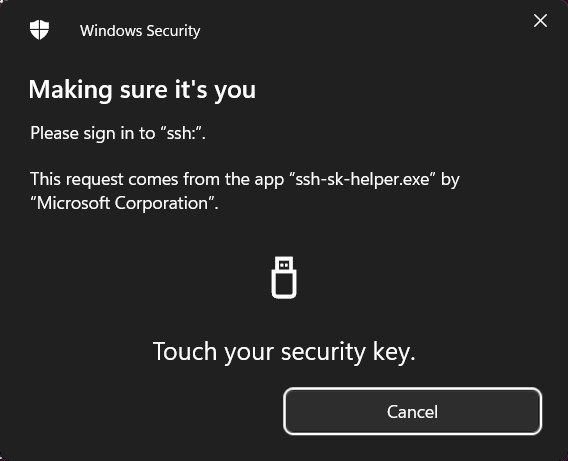
The relevant parts of the debug ouput shown, the rest removed.
Voilá! You now have a FIDO2 Security Key and ML-KEM protected SSH connection.
Every time your WSL ssh client accesses the key in your Windows ssh-agent it will need you to select the security key and touch it.
If anyone knows how to skip that "Sign in with your passkey" and just use my Yubikey, please, PLEASE let me know!

